
Learn how to make miniature dollhouse furniture, mini paper accessories and get techniques, tips and monthly tutorials.
Sunday, February 17, 2013
One side has 6 holes and one side has 7
I explained that we are weaving a closed circle or rectangle, we need an uneven amount of holes. One side has to have 1 less hole, I have to take it from a side, I chose a short side. Kris
1 Inch Scale Wicker Table with Tile Top - How to make a 1 inch scale wicker table with a faux tile top.

This is the little wicker table we are going to make. I haven't gotten complicated with different weaving techniques, just the standard over and under.
The faux tile top comes from my good friend, Mary. I thought it was so innovative that I wanted to share it with you.

Let's start by cutting a piece of card stock 2 1/4" x 1 1/2".

Did you ever get a 40% off coupon from Michael's and not know what to do with it?
I bought this Martha Stewart punch with one of my coupons. I never used it for what I bought it for. Mary borrowed it for an idea she had.

Mary used a scrap booking paper that represented water, I couldn't find that so I am using this paper. The idea is to get a paper that has subtle to sharp color differences.
You can use any punch you might have that you think would work.

I punched out my squares. Mary used all of the shapes to make a mosaic design. So take a look at your punches and see what you might be able to use. I am going to use just the squares for my tile design.
Mary has such a good eye, she can put things just right, I worry them to death and lose the spontaneity.

I put a tiny dot of white Elmer's glue on the corner of the card stock. I am using white Elmer's so I have time to move the square around to line it up.
Glue six of the squares across the short end of the card stock.

Now, I will begin to glue the squares on the long side.

I glued 9 on the long side of the card stock, counting the beginning corner.

I am randomly choosing squares to glue on, kind of, sorry, Mary. "Turn it lose, Kris"

You can see in the previous picture and this one that I have drawn lines and made tick marks to keep my squares in line.

I'm finished and it didn't take very long.

Square up and trim your tiled card stock.
It looks random, doesn't it?

Cut 2 pieces of mat board the size of your tiled card stock.
.JPG)
Glue the 2 pieces together, you can use tacky glue for this.
Measure 3/32" away from the edge and draw a line around the rectangle.
.JPG)
I have drawn a diagram for you see how many holes are needed for the wire.
When you are weaving in a closed circle or in this case a rectangle you have to have an uneven amount of holes. This table has 39 holes. When you weave something flat, say a head board you have to have an even amount of holes.
I marked where I wanted the holes to be and then made holes with a large straight pin, corsage pin or "T" pin. This makes it easier to drill .

For miniature wicker we use cloth stem wire. For the legs we need 20 gauge and for the rest we use 26 gauge, it's smaller in diameter.
This wire is wrapped with thread. Some brands have the thread coated and it cuts more easily, especially if your wire cutters are dull.
This can be ordered on-line.
.JPG)
From the 20 gauge wire, the larger one, cut your 4 legs at 1 3/4" long.
Make sure they are the same length or your table will wobble.
.JPG)
Choose a drill bit that is the diameter of the 20 gauge wire and drill the 4 corner holes for the legs.
Choose a drill bit to fit the diameter of the 26 gauge wire and drill the holes. I've shown the 26 gauge wires glued in here, don't cut any wire, yet, just drill the holes.
Glue only the 4 legs into the table top. I used yellow wood glue for this.

A note about drilling: Put something underneath the table top and drill through the 2 layers of mat board.
While the legs are drying get a scrap of foam core and draw the same size rectangle as your table top.

Use a large pin like a "T" pin and make holes in the corners of the rectangle.
Widen them out a bit for the legs of the table to fit into.
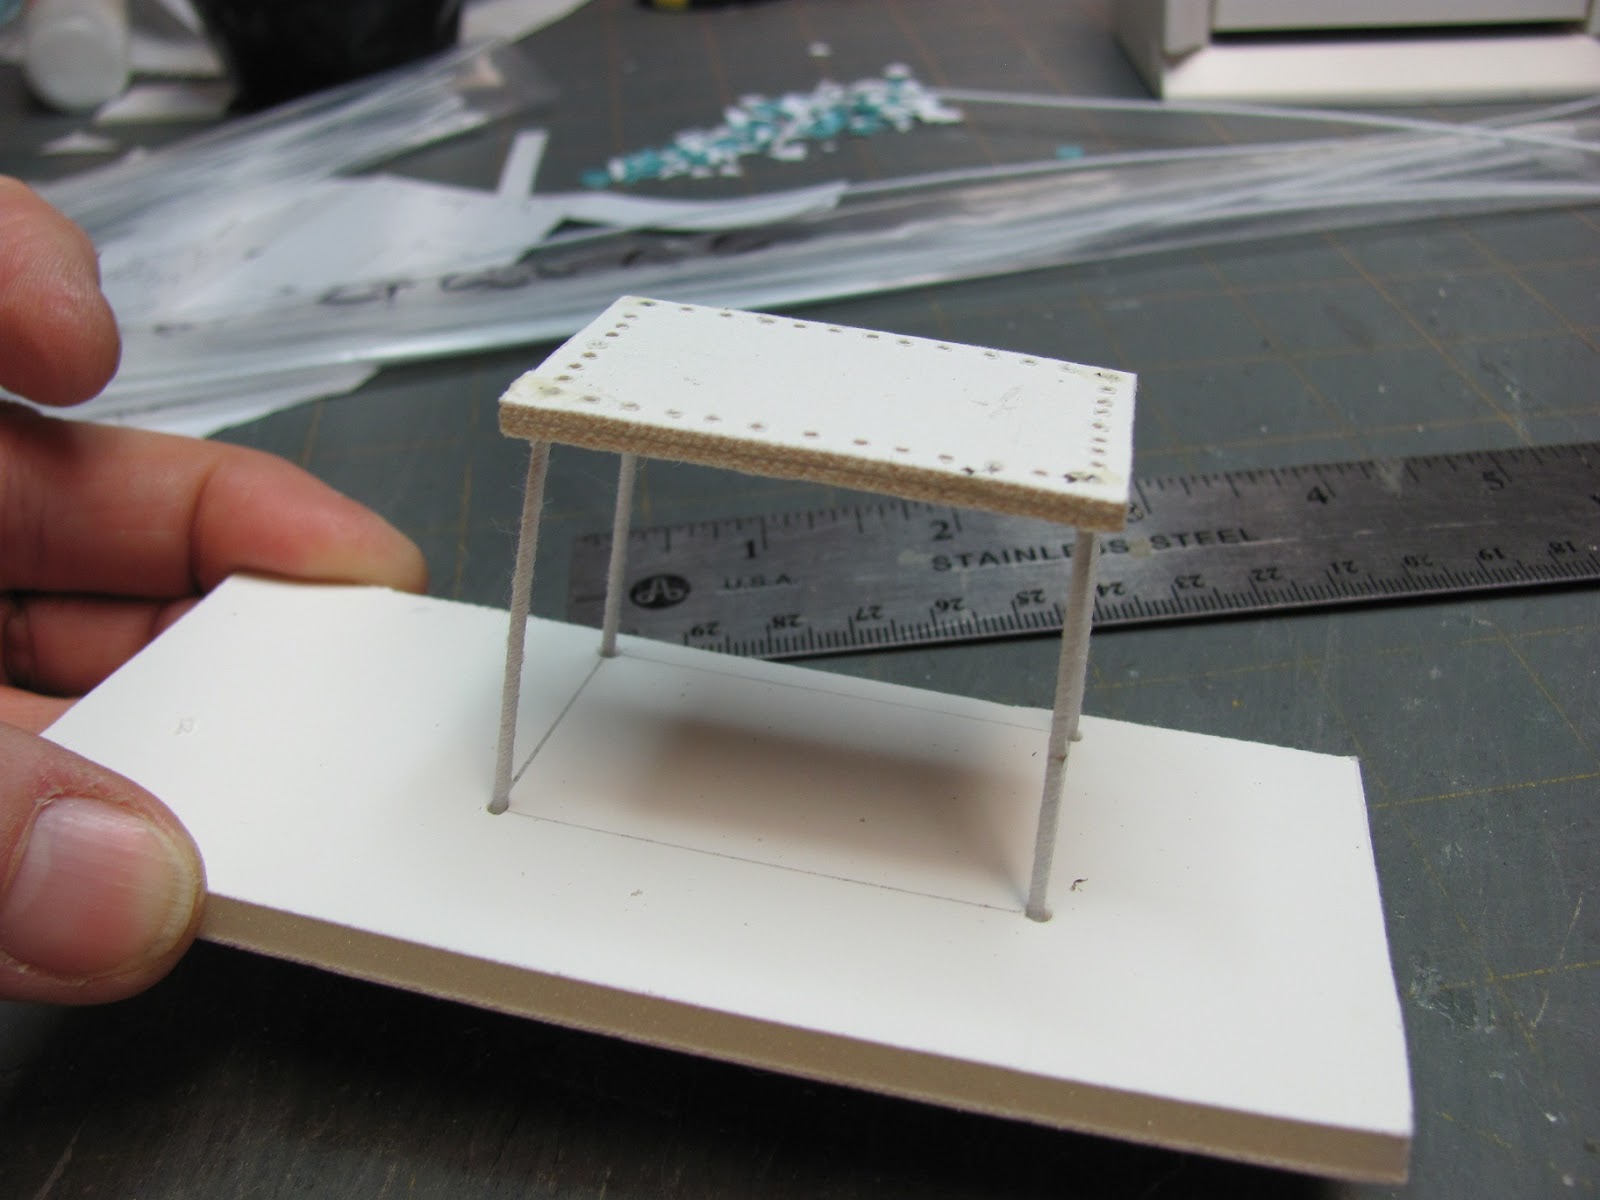
When your legs are dry fit them into the foam core. This is a base for you to set the table in from time to time to keep everything square and where it should be.
Thank you, Mary, for this excellent tip!

Cut the 26 gauge wire 1" long and glue it into the holes on the edges of the table top.
Please let these dry.

I am going to use waxed linen thread to weave the table. This is what the artisans use. This is available on-line.
I have a tutorial on weaving a basket with crochet thread. Please refer to it for information on using crochet thread instead.

A ball of crochet thread is a small investment for trying out a project. This is a ball of Coats Knit-Co-Sheen, it also might be called Classic Crochet Thread.
You must cut the crochet thread into lengths you are comfortable with and paint it. Put the paint on your fingers and run the crochet thread through them. Hang the thread up to dry.

That's Digger, one of the new kittens that came to live with us. Now, 4 cats.
The waxed linen thread is on top and the crochet thread is hanging limply at the bottom.
That's the problem, you need to have the thread stiffened, it works better.
I've highlighted that. I've gotten so many questions, "Why do I have to paint the thread?"

Let's start weaving.
Can you see the beginning thread laying on the table top behind the wire? Glue that thread down.
Now, begin the over and under weaving all around the table top.
You should come around to the beginning and the thread should go behind the wire where you began.

When you are weaving try not to pull tight, you will pull the legs out of shape. You also do not have to push the weaving down, just lay the rows on top of each other.
I wove about 3/8".

First of all, trim off the thread and glue it behind the leg.
I've set my table into the foam core base.
If you want you can weave while the table is in the base.

I cut 2 pieces of 26 gauge wire 4" long.

I've twisted them together in the middle and then I glued them together with tacky glue.

Draw lines from corner to corner forming an X on your foam core base.

Place your wire onto the foam core and bend it to fit at the corners.
You can tape the middle to the foam core it you want.

I used a pair of needle nose pliers to bend the wire at the corners.
I think you could also place the table back into the foam core and bend the wire around the legs. I haven't tried this, though.

I measured from the bottom of the legs up 1/2" and marked each leg.
Next, I glued the wire onto the legs.
I used tacky glue.

Put the table back into the foam core base and wrap the wire around the legs.

I've got a close shot of the wire wrapped around the leg.

Cut off the extra wire.

Put the table back into the foam core base.
Glue the tiled top onto the table top. I used tacky glue for this.

This is what I used to paint the top of the tiles. I bought it at Michael's.
It is a hard and shiny finish. I had a hard time taking the pictures without showing a shiny top.
I only had to put one coat on, also.
Go ahead and coat the tile top.

While the tile top is drying make 3 braids to cover the edges of the table top, the edge of the weaving and the edge of the shelf we will put in later, (optional).
I used 10" of thread, 6 strands. I want the braid to be wide enough to cover the edge of the table top. You might have to experiment with how many strands you will need if you are using painted crochet thread.

I used tacky glue to glue the braid on and used alligator clamps to hold the braid until it dried.

The wire we added at the bottom can be left bare or wrapped with thread. Full-size wicker furniture is not sturdy and that's why there would be a bottom brace arrangement like the one we made.
Sometimes the weaving is shaped so that it is lower at the legs and higher at the sides. This lowering of the weaving also gives the legs some stabilization. I found this complicated to explain to you so I decided to add the lower brace section.
I thought a shelf might be nice to add to the table.
From card stock cut a rectangle the same size at the table top. Trim this until it fits like you see in the picture. Please notice that I have cut the tips of the corners off at the legs. This is your pattern for the shelf.

Place your pattern onto the brace and test fit.

Use your pattern to make a shelf from 1 layer of mat board.
Cut the shelf out.

Glue the shelf onto the brace. You might need to clamp the shelf until it's dry.

With the shelf dry we can wrap the legs.
Use tacky glue to glue the tip of a 10" piece of thread to the inside of the table.
Now, wrap the thread around the leg.

When you get to last little bit apply tacky glue and . . . .

wrap to the end, then apply glue to about 1/8" of the leg and. . . .

wrap 3 times over the tip of the leg.
I cut my braid and used tacky glue to glue the braid to the edge of the shelf.
You could cut the shelf differently, so the braid would be wrapped all around, but I like the way it looks with the shelf being smaller than the top.
A few thoughts about using painted crochet thread. Yes, if I were doing this again, I would use the crochet thread. I don't like the look of the white waxed linen and I always paint it when I finish the piece. This painting fills in the weaving. So how would I go about it all? I would paint thread and wire the same color. Make my table. When I had the shelf cut I would paint it and finish up the table. When I finished, I wouldn't have to paint.
I would like to thank Mary for her idea for using the punch to make tile, using this kind of scrap booking paper for tile and the mosaic idea. I hope this gets your creative juices flowing.
Until next time,
Have fun, Expand on it, Make it better . . . . .
Just keep making minis!!
Subscribe to:
Posts (Atom)