Wednesday, December 18, 2013

Building a Quick Room Box Tutorial ---- How to build a quick room box for dollhouse miniatures from foam core and a purchased frame.


I have been explaining this room box a lot lately to followers that have e-mailed me.  I forget that not everyone has been doing miniatures for as long as I have.  I don't get any of the miniatures magazines so I don't know what the DIY projects are and if this has been in there.  I don't get any of the magazines on purpose, I don't want to copy, even unconsciously.

I hope the directions aren't too tedious with all of the measurements.  I have a diagram later in the tutorial to help out.


This is the finished room box, it's about 6 inches deep, 10 inches from side to side and 8 inches tall.

I know 8 inches is really a 8 foot ceiling height and that would be short for real life full size, but I think it works here.  You can turn the box and have a 10 foot ceiling if you need the height.


Boy, this is blurry!  This is a collage frame I copied from the internet.  When I bought my cheapie frame these were on sale.  My husband pointed that out to me, too.  "Can't use that, I said I needed an 8" x 10" frame."  While lying in bed that night I thought, "Darn, I could have used that."  This would be good for  themed room box settings, maybe something for a gift.  This type of frame could also spot light some of your best miniatures.


I saw this on the internet, too.  This frame would also be good for a themed gift or setting.


For hanging on the wall I would probably not make these two examples as deep as the box I am making in the tutorial.


Keep your pencil sharp and put a new blade in your craft knife.


I have a piece of 20" x 30" foam core.  This is the most common size available.  I also have the $5.00 frame.


Take the back out and if  you can get it out take the glass out.  I couldn't get mine out so I just left the glass alone.


Measure inside the rabbet, I didn't misspell, that step down on the back of the frame is called a rabbet, it's for things to fit into, like glass.
Measure both directions, it's probably about 8 1/16" x 10 1/16".


I want you to find the center of the foam core.
To do this for the 20" side measure in from each side and mark at 10".
In the picture I've marked from one side and just marked the from the other side.  See the space I have between the marks?  That's how much short of 20" the board is.  By eye or ruler mark the center of this space.  Do this for the other end of the board.


For the long side that is 30" measure from the side to 15" and mark as you did above.  Measure from the other side and mark.  If you have a little space between the marks divide it half as you did above. Turn the board around and measure and mark the other side just as you did before. 


Draw lines from center marks to center marks.

I don't have a "T" square long enough for this task so I measure and mark.


More lines to measure for.

Measuring on the long side: have the long side facing you and measure from the middle line out to the side 4 13/16", mark; measure from the middle line out to the other side 4 13/16", mark.
Do this for the other long side and draw lines connecting the marks.


Turn the board around and measure the short side.  Measure from the middle line out to the side 3 13/16"and mark; measure from the middle line out to the other side 3 13/16", mark.
Turn the board around and measure just as you did above.


Draw lines connecting the marks.


I've got the short side of the board facing me.

I have measured 3/16" away from the first line on the left and drawn a new line.  Do you see that the new line is closer to the side, not the middle?


I've measured 3/16" away from the other side's line and drew a new line.


"X" out the old line, you won't cut on the old line.  I've also made a squiggly line in the corner, this is waste and will be cut out.


The new lines have all been drawn.  Take care where they are.


I've got the short side facing me, again.  A long side is on my right.  I am measuring from the first line to the edge.  This should be around 6 3/16".


I've now turned the board so that the long side is facing me.

Got your measurement from above?

Measure from the first line to the edge that measurement, I'm using 6 3/16", mark.


I've drawn a line connecting the marks I made.  There is a very light squiggly line on the right of the new line, that part is waste and will be cut off.
Do this for the other side.

Cut off those ends.


My pencil lines are light and hard to see in the pictures.  I recommend printing this out on a sheet of paper to guide you.


This is what you should have, now.


Cut the corners out.  Do you see that I did not cut on the "X"ed lines?


Cut on the dotted lines, don't cut through.
Do you see how the sides will cover the top and bottom edges?


As soon as I got the box folded, not glued yet, Digger, my cat got in.

Now, that he's out let's put some glue on the edges.


I've got glue on the edges.

If I can keep Digger's tail out of the glue that will be good!


I've got the box glued together.


Showing the side and back of the box.


I've got the frame on.


Showing the side.


Make some legs from stacked and glued foam core to match the height of the side of the frame.

If I were hanging this on a wall I probably would not make it as deep as this.

When I have finished decorating I will glue the glass to the frame and the box to the glass.  I will use tacky glue.

You can cover the box with scrap booking paper or wall paper, I have even covered the box with brown paper.  Use something that coordinates with the inside decorating.  The box I covered with brown paper is "Carl's Room", I think that's in the "Things to do, Things to see" list under Room Boxes.  The box has an Asian theme.  I found some stickers of post marksand post cards from Japan, origami, etc. in the scrap booking isle.  I put them on the brown paper and used some Asian stampers for more decoration.

I usually cut a piece of foam core for a faux wall for the corner.  I will put a window in that wall.


This is a picture of a very, very early room box I made for my youngest daughter, Sam.  I have the window in the corner with flowers.  I fixed a battery operated light in the window and the battery also operates the teddy bear lamp I made.  This hangs on the wall and with a click of a switch it will light up.

If I can find the materials would you like me to show you how I did the battery lighting?

I hope you didn't have too hard of time following all of the measuring.  If you have any questions please remember you can e-mail me at:
kkcompas@yahoo.com


Don't forget to send me your pictures of finished tutorials for the FOLLOWER'S GALLERY, those pictures are sent to:
camceiling@frontiernet.net


I hope you all have a MERRY CHRISTMAS AND A HAPPY NEW YEAR!!!


Have fun, Expand on it, Make it Better,
JUST KEEP MAKING MINIS!!


See 'ya next year, Kris


Tuesday, December 17, 2013

GALLERY


I have received pictures and I love them.  I can't seem to save and copy in the Yahoo, so

 PLEASE RESEND TO:

camceiling@frontiernet.net

I know I can copy and save there.  I can't wait to get the Gallery going.

Thanks for understanding, Kris


Monday, December 16, 2013

LET'S START A GALLERY

I've been sent pictures over the past few years and thoroughly enjoyed seeing them.  I don't know why it's taken so long for me to think about sharing them regularly with you.

So, I want you to send your pictures of the tutorials you have finished.  I will use your first name only unless I am told to keep it anonymous.  You will be encouraging others to try the tutorials out.


I am hoping this is going to be a fun thing to do and see.  I know I have enjoyed the pictures, I think you will too. 

Working on a small tutorial for December,
Kris

camceiling@frontiernet.net

Monday, December 2, 2013

To: Gulay Temizel Erturk

Hello,
Please write me an e-mail at kkcompas@yahoo.com and we can talk.
Kris

Sunday, November 24, 2013

Thanks for the help.

Thank you all for responding.  You see I published on Tuesday the 19th.  I received an e-mail from Lucille saying that she thought something was wrong since she hadn't received notice that I had posted and just looked me up and found that I had posted.  I have the best followers!!
I really had fun making the bench and remember you can make the bench even if you do use your craft knives to cut the mat board. 
Kris

Saturday, November 23, 2013

ARE YOU OUT THERE?

Hello,  I've been told that my November tutorial didn't get "out there".  Being computer illiterate I asked my son for help.  He wasn't familiar with Blogger but he did put me into Google+.  I am hoping that this will help.  I have never known how you figure out that I've posted but your comments show up pretty quickly.  I wasn't on Google+, I'm not on Facebook and I don't follow other blogs.  So help me out please, and if you have been notified of this posting let me know.

And don't forget to look at the November blog.

Kris

Tuesday, November 19, 2013

1 Inch Scale Dollhouse Bench Tutorial


This is my inspiration for this month's tutorial.  I have a notebook I keep catalog pictures in.  They are pictures of full size pieces of furniture I think we can make from mat board and card stock.


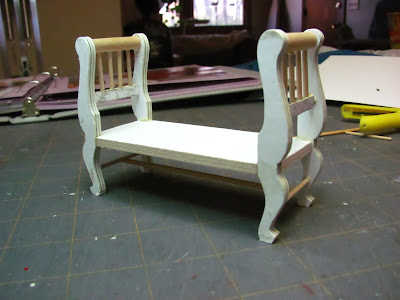
This is my finished version.


I have a note to begin with.  I have used 3 layers of mat board for the leg/arms.  This makes a fine and sturdy bench.  I do think that you could use 2 layers of mat board and it would still make a fine and sturdy bench.  You would have to widen out the seat base by 3/32" to compensate for the loss of the 2 pieces of mat board (one for each side) in the leg/arms.  Don't do this by adding to the long sides, cut the pattern in half and add in the middle, lengthwise.  Keep the seat base to 3 layers.


These are the patterns for the bench.  On the left side of the blog there is a list, "Things to do, Things to see".  In this list you will find a short tutorial on how to re-size the patterns, "HOW TO RE-SIZE THE PATTERNS".


Adjust to size the leg/arm pattern and the seat base pattern.  Copy the leg/arm pattern onto paper 12 times.  Use glue stick to glue the paper to a piece of mat board.  Cut out the leg/arm patterns with your craft knife.  This uses the least amount of mat board depending on how close you have put the patterns.

OR copy the pattern 4 times onto paper and glue to 3 layers of mat board, (that's been glued together with yellow carpenter's glue first) and cut out the leg/arm pattern using a scroll saw.  When gluing the mat board together don't use too much glue or the mat board might curl up.  Smear the mat board around a bit on the glue and then line up the pieces.


OR copy your pattern once onto card stock for a pattern to trace from.  Cut 12 pieces of mat board, 3 pieces for each leg/arm.

Glue these stacks together using yellow carpenter's glue.


Trace the leg/arm pattern onto one of the stacks.


Glue the stacks together using tacky glue.  ONLY GLUE ALONG THE EDGES, AWAY FROM YOUR PATTERN.


My stack is ready to be cut.


I am using my scroll saw to cut the 4 legs out all at once.


All cut out.


Please, don't let having to cut 8 to 12 leg/arm patterns out deter you from making this bench.  Just put a new blade in your craft knife and spend a little time, take a couple breaks and  you'll have the leg/arms cut out before you know it.


Place the legs out like mine, 2 facing left and 2 facing right.
Place the pattern onto the legs and mark using a "T" pin for the holes.

I am going to use toothpicks for the rungs .


I used a 5/64" bit, this is a common size and is available at a Home Depot.  Test the size on a scrap stack of mat board to see if this works for you.  Cut the tapered end off the toothpick, sand the edge a bit and insert into the hole.


I have drilled holes where I had marked.  Don't drill through. 


Trace the seat base onto 3 pieces of mat board, cut out with a craft knife and glue the pieces together.
OR you can glue the mat board together first and cut the seat base out all at once like I did with the legs.


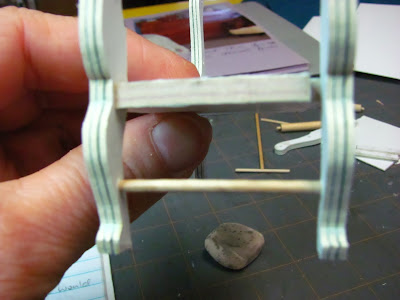
Glue two legs into the notches of the seat base.  Set this off to the side to dry.


I'm holding the bench with a leg temporarily set into a notch and measuring from outside edge to outside edge of the legs.
I measured 1 5/8".
I am going to subtract 1/8" because my holes aren't drilled through.  I still might have to trim, depending on how deep I have drilled my holes.  That's what dry fitting is for.


I am cutting my toothpicks at 1 1/2" and marking the centers at 3/4".


Sorry, this is a bit blurry!
Sand the ends of the toothpicks just to take the raggedness off and insert them into the holes on the legs.

Can you see the gap on the right side?  I need to trim the toothpick just a bit.  Dry fit both sides like this.


I've trimmed the toothpick and now I have a fit.

While you have the toothpicks and loose legs temporarily on the bench measure between the toothpicks for the length of the long rung we will make next.  I measured about 3 5/8" to 3 11/16".  It's all right if you cut a little extra.


You can fancy your bench up a bit by using files, (I used a triangular file) and sandpaper to create beads and other shapes on the toothpicks.


I am using a bamboo skewer for the long rung that connects to the two toothpicks on the legs.  I buy these at the grocery store.

I've sanded it just a bit so that it fits into the 1/16" hole in my circle template.


I've used my craft knife to whittle the ends down.


I am using a "T" pin to mark a hole in the center of my toothpick rung.  Don't push too hard, just enough for a small drill bit to fit into.


I am going to use my trusty little drill bit set, (from Hobby Builders) to drill these holes.

The easiest way I have found to drill something like this is to start out with a smaller bit than what you need and graduate up to the bit that will fit your whittled bamboo skewer.


I drilled a hole in one rung and glued the skewer in.

I temporarily fit the bench together, again and checked the length of my center rung.

Can you see on the right side that I am a little long?  I'll trim.


I've trimmed and I am happy with the fit.  Everything looks square.


I'll glue the other short rung, (toothpick) onto the long rung, (bamboo skewer).


Glue the rung assembly into the legs on the bench.


I'm going to make the upper section and I'm measuring between the sides, (leg/arm), it's 1 1/4".


The first part of this section is made from mat board.  Cut a strip of mat board 3/16" wide and at least 5 1/2" long.
Measure and mark 1 1/4" four times on this strip.


I used a square to draw and cut my lines.


Here are the four pieces cut.


I've glued one on top of the other, now I have two pieces.


I am using a piece of 1/4" dowel for the top of the section.

Measure and mark for 2 pieces at 1 1/4".


You can cut the 1/4" dowel with a craft knife by rolling the knife and dowel until you can snap the dowel apart.  Or you can use the little mitre saws we use to cut trim for our dollhouses.


Mark the center of the ends of the dowels with a "T" pin.


I've drilled the holes starting out with a smaller bit than I needed and graduated up to the 5/64" bit for the toothpick that will be glued in.


Glue bits of toothpicks into the holes leaving about 3/32" out.
We are going to "dowel" this section into the bench for sturdiness.

Yes, that's Digger's paw.  He likes to lay between me and the keyboard on my arms while I type, too.


Remember the 2 pieces of mat board you just made up?  Use a "T" pin to mark the centers of each end.


Drill holes as you have done before.

You will have to grip the ends of the mat board tightly when drilling or the mat board will just spread apart.  Actually drill a hole for the toothpicks to go into.


Measure and mark the dowels into 1/4" sections.


Use a "T" pin to mark the holes.

It is important that these are in a straight line.


I did use my Dremel to drill these holes but it could have been done with the little drill set, too.

I used the graduated bits to drill this, too.


Transfer the markings from the dowel to the mat board piece.


Mark with a "T" pin.


Drill out matching holes.


Put the dowel and mat board piece into a loose side and measure between the two.
I measured about 11/16" between.
I am going to add a bit to top and bottom for the toothpicks to be inserted.  Total 15/16" is what I'll cut 8 toothpicks.


I've glued the toothpicks into the mat board piece.  I did that because the mat board is certainly more flexible that the 1/4" dowel and I might need the flexibility to move the toothpicks slightly to get them into the 1/4" dowel.
Even with all my measuring I'm not always right!


 Dry fit the 1/4" dowel on.


Dry fit the section onto the bench to see if you need to trim the toothpicks off.

I did need to trim, so I took off the dowel and trimmed the toothpicks.

Now, I am dry fitting again.


The section is fitting so I'm going to glue it in.  The next thing to do is to glue the leg/arm on.  Remember to put some glue into the notch so the leg is glued to the bench.

I did not dowel the leg into the bench.  I thought the notch gave me enough surface to glue to.  If you wanted to dowel it I would drill into the flat area between the upper and lower sections on the side where you can see the layers of mat board.  We will cover this edge with a layer of card stock.


All together.


Measure the width of the leg/arms.  I like to cut the strips of card stock just short of the width that is measured.


Glue the card stock strips on covering the layers of mat board on the leg/arms and the edges of the seat base.


You know, when I start one of these I never know how I am going to finish it.  Most of the time I just make it up as I go.

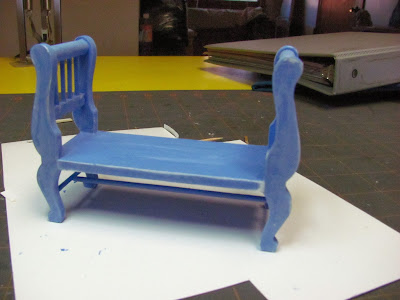
I am painting the bench blue.


I sanded the bench.  I painted and sanded 3 to 4 times getting a smooth finish.


I took the bench outside and gave it a coat of clear gloss, I used Krylon.

Then I brushed on and wiped off a coat of grey paint.

That wasn't enough so I mixed some dark brown with the grey and painted that on in spots.  I did not dilute the paint with anything.

I used a scrap of "T" shirt fabric to buff the whole thing when it was dry.


I want you to make a pattern for the seat cushion using the seat base pattern.
Trace the seat base pattern onto card stock.  When you cut it out leave the line on the scrap.  Set the new pattern on the bench, do you have about a 1/32" all around?


Trace your new pattern onto foam core and cut out.


Dry fit the foam core onto the bench.

If you are a little tight on the ends trim off just enough foam core to let you fit the cushion on.

Be sure this fits easily.


To begin with cut two pieces of Thermolam batting.


Use tacky glue for the upholstery.
Glue the small piece on first then the larger one.


The next piece is cut to fit the top, don't go over the sides.


The fourth piece is cut to be glued to the sides.  Cut the notches out.


Glue the Thermolam onto the sides and trim off the extra.


Glue on your fabric.


Cut into the corners.


Apply glue into the notch and onto the fabric.


Press the fabric into the notch and pull the fabric down and create a triangle.  Squeeze tightly on the triangle of fabric to secure.


Another view.


Another view.


Trim off the triangles.
Glue the seat cushion to the seat base.


At the left of the blog there is a list, "Things to do, Things to see", in that list is a tutorial "How to make piping for pillows", follow that to make 4 pieces of piping to glue into the seam where the cushion meets the seat base.


Another View.


Another view.


I've added another pattern to explain better where to cut the seat base pattern if you want to use only 2 layers of mat board for the leg/arms.

Cut on the dashed line and spread apart 3/32" to make larger or wider when using 2 layers of mat board for leg/arms.


Do any of you see chairs from this tutorial?

I  hope to see some pictures of what you've done with this.

Happy Thanksgiving!!!!!!


Have fun, Expand on it, Make it Better,
Just Keep Making Minis!!!!!!!!!!!!!


TTUL  Kris